
In which I find that the idiots that put together my kit sent me a nut that was shorter than my fingerboard.

Hanging to dry
When we last left the uke – I’d just done the second coat of filler – I use a coat hanger to hag it up to dry – and then went over the body again with 320 grit sandpaper – and then onto the neck.

Trimming the fingerboard
I marked the fingerboard to match the profile of the neck – and then trimmed it to fit.

Fingerboard detail end
To make the detail on the end – I marked the center of the fingerboard – and then went after it with my rasp – eyeballing the profile.
When it was profiled – I trimmed the top – and then went to do the frets. You use the fret hammer to firmly tap them into the slot.

Setting a fret
And then use nips to trim off the fret. Setting the frets was pretty simple.

Setting the frets
 When I eyeball the fingerboard – it appears that the frets are not exactly square – which should make the intonation interesting – I’ll call it a Jazz ukulele.

No nuts
So, I get ready to glue up the fingerboard to the neck – and I pull out the nut that came with the kit – and it’s shorter than the fingerboard. This will make the action pretty tight. I glued in a scrap of wood for position – and ordered a blank classical guitar nut from Stewart MacDonald – so I’ll need to build a new nut down the road.
 But I got the neck and fingerboard glued up.
 And then sanded it down.

ukulele?
When I stuck the neck on the body it kind of looked like a uke.

Drilling holes for the spots
The next thing I did was drilled hole for the fret markers that are on the 5th, 7th and 12th frets. This is when I should have been using the most important tool –

The checklist
The checklist. If I had – then I would have put in the markers before the frets so I could easily sand down the fingerboard. But I didn’t
 So I have to sand between the frets – and the grain is running long ways – so lots of little short strokes. A lot more work. I also only had a regular drill bit (1/4″) to cut the holes – and it did a messy job – so there was tear out at the top – they look kind of messy – I’ll have to figure out some way to fill around them at some point.
 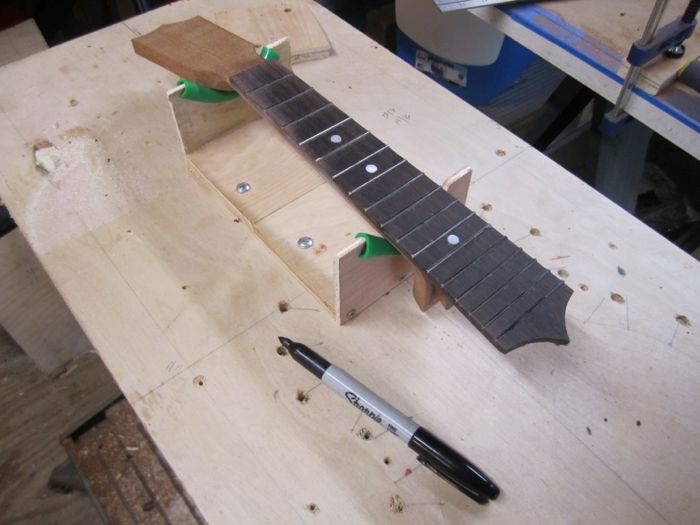 The next step – using my to do list – was to level the frets. You color each fret with a marker – then

Leveling the frets
Then sand with 320 sandpaper (probably should have used 400).
 Then you look for the spots that are still colored – those are the low spots – you sand until everything is shiny – then (theoretically) all the frets are the same level.

Dressing the edges
Then I used the block to relieve the edges of the frets – at about a 45 degree angle – mas o menos.

Rounding the edges
Then used a fret file to round the sharp edges – this file only has teeth on the sides – the edges are rounded so they won’t cut the fingerboard. This went pretty quick – a few passes on each side of each fret was all it took to make them smooth.

Profiling the frets
This is a fret profiling file – the edges are the cutters – and they’re dished – so you can round off the tops of frets that have been squared off by being leveled. This just took a couple of passes as well.

Drilling the peg holes
Then I drilled the holes for the pegs. I used one of my tap handles and drilled them by hand – working on the theory that I would screw it up more slowly – which seemed to work.
 I did get an $8.00 drill guide – because I had no confidence that I could drill a straight hole.

Peg holes
But I got them all drilled –

Then I sanded down the neck with 220 and 320, and put on the first coat of clear sealer.
I’m hoping to get the neck glued up to the body tomorrow sometime – then I’ll have to figure our the bridge – I’m thinking with the frets slanty-wise – I might have to mount the bridge cockeyed to get it close to in-tune
We’ll see
Kevo